Saturday, October 22, 2011

Another Button Buddies baby card


The baby rattle in the Button Buddies card makes a great focal point for this card.  The second layer of this card was texturized using the Backgrounds #1 Textured Plates.  The Very Vanilla cardstock that the blue rattle was stamped on was cut out using the Big Shot Die-Cut Machine and the Scallop Rectangle Clearlit Die.  These cards are quick and easy to make with not a lot of fuss.  I am running low and need to make somre more to have on hand.

Stampin' Up! Supplies used:
Stamp Set: Button Buddies, Teeny Tiny Wishes
Paper: Bashful Blue card stock, Very Vanilla card stock
Ink: Bashful Blue Stampin' Write Marker, Pacific Point Stampin' Write Marker, Early Espresso Stampin' Write Marker
Accessories: Bashful Blue 3/8" Satin Ribbon, Stampin' Dimensionals, Scallop Rectangle Clearlit die, Background #1 Textured Plates, Big Shot Die-Cut Machine

Happy Stamping!
Michelle B
Independent Stampin' Up! Demonstrator
inspire. create. share.

Thursday, October 13, 2011

Sparkly Glimmery Noel Stockings card


A Christmas card stamp camp could not be complete without shiny, sparkly red Christmas stockings!  Here is the 3rd card that my stamping friends will be making on Saturday, October 15 from 1:00 to 3:30 (please note date has changed from previous October stamp camp post). 

This Noel Stockings card was made using a some stamping items from Stampin' Up!'s Holiday Mini catalogue.....Mini Jingle Bells foundon page 30 (48 bells from $3.95 - wow!), Stocking Builder Punch found on page 34 and Red Glimmer Paper found on page 41.  The Red Glimmer Paper is an amazing price.  You get 2 sheets of 12" x 12" Red Glimmer Paper for only $5.95.  I hope my stamping friends enjoy making this Sparkly Glimmery Stocking Christmas card as much as I did.

Stampin' Up! Supplies used:
Stamp Set: Many Merry Messages
Paper: Pear Pizzazz card stock, Very Vanilla card stock, Red Glimmer Paper, Red Riding Hood card stock
Ink: Early Espresso Classic Stampin' Pad
Accessories: Big Shot Die-Cut Machine, Perfect Polka-Dots Textured Impressions Embossing Folder, Linen Thread, Stockings Builder Punch, Mini Jingle Bells, Stampin' Dimensionals, Neutral Brads, Designer Label Punch, Red Riding Hood 3/8" Taffeta Ribbon

Happy Stamping!
Michelle B
Independent Stampin' Up! Demonstrator
inspire. create. share.

Wednesday, October 5, 2011

For You Days of Gratitude card


Here is a card that I made for one of my friends at work.  It was her last day today and to celebrate her new venture I made her a "for you" (instead of good-bye) card.  All of us at work signed the inside of it.  I hope she liked it.

This card was made using the Days of Gratitude stamp set and a bunch of Stampin' Write Markers.  First I colored the whole image with a Peach Parfait Stampin' Write Marker, I then went some of the stamp with an Old Olive Stampin' Write Marker and then finally colored the edge with a Chocolate Chip Stampin' Write Marker.  It turned out to be a fall colored card which I think suits the big stamp perfectly.

Stampin' Up! supplies used:
Stamp sets: Days of Gratitude, Teeny Tiny Wishes
Paper: Crumb Cake card stock, Choclate Chip card stock, Very Vanilla card stock, Pear Pizzazz card stock
Ink: Peach Parfait Stampin' Write Marker, Old Olive Stampin' Write Marker, Chocolate Chip Stampin' Write Marker
Accessories: Scallop Border Punch, Stampin' Dimensionals, Antique Brad, Paper Piercer, Jewellery Tag Punch, Pumpkin Pie 1-1/4" Striped Grosgrain Ribbon (retired).

Happy Stamping!
Michelle B
Independent Stampin' Up! Demonstrator
inspire. create. share.

Saturday, October 1, 2011

October 15 Christams Card Stamp Camp

Merry Christmas Sparkly Wreath card

On Saturday, October 15, 2011 from 1:00 to 3:30 p.m. I will be hosting my second Christmas Card Stamp Camp.  Please come and join me for a couple of hours of stamping fun.  You will be making 12 Christmas cards (4 each of 3 different designs) and matching envelopes.  At each stamp camp there will be a draw for a "stamping surprise". If you attend all 4 Christmas card stamp camps and your name will be entered into a draw on the last class for a great prize....a FREE STAMP SET!

Stamp Camp Details...........
Cost is $25.00 for non-club members or $22.00 for club members
Class Dates: September 18, October 15, November 13 & December 3, 2011.
Time: 1:00 p.m. to 3:00 p.m.
RSVP: click here to register via email


Season's Greetings Snowflake card

The inspiration for the above snowflake card came from an amazing Halloween card that the talented Mary Fish did.  Thanks Mary for your inspiration!

Happy Stamping!
Michelle B
Independent Stampin' Up! Demonstrator
inspire. create. share.

Thursday, September 22, 2011

Sweet Centers Balloon Birthday Card


I needed to have a birthday card ready for tomorrow and here is what I ended up making tonight.   Isn't it fun!  I was looking through my birthday stamp sets and this one popped out at me....It is the Sweet Centers ( 116521) stamp set.  I can honestly say I don't think I have ever made a birthday card with this stamp set.  Well now I guess I can't say that anymore.  Haha!  When putting candy in a card like this one you need to make sure that the recepient of the card is able to get the candy out after.  I did this in 2 ways.  I took my Cutter Kit (106958) and made an X in the Crumb Cake card stock as well as on a piece of Whisper White card stock.  Now all the birthday gal has to do it open both piece of card stock where the X is and voila she has a little yummy treat on her birthday.  Here are some pics to show and directions on how I made this card....


Make a 1-3/4" circle in a piece of Whisper White card stock.  Make sure the edges of the Whisper White card stock is small enough to center the punched out circle.  Set the punched out circle aside as we will be using it later.  Next stamp the Balloon Basket image from the Sweet Centers stamp set using a Early Espresso Classic Stampin' Pad.


I put the Whisper White card stock with the balloon basket image on top of a piece of Pink Pirouette card stock and then traced the 1-3/4" circle on to it.  Because the Pink Pirouette card stock had wider edges I could not use the same Punch that I did on the Whisper White card stock.  Instead I had to use my Circle Scissor Plus to make the hole here.


Next I placed the Pink Pirouette card stock onto the center of the Crumb Cake card front base so that I could make an X in the center of the circle so that the candy could be easily accessible.  I made the X using the perforation tool in the Cutter Kit.


I then placed the Whisper White card stock on top of the Pink Pirouette card stock to see what the card would look like.  I did not adhere it down yet.  I then put some Smarties inside the Treat Cup.  I then took everything apart and placed the Pink Pirouette card stock over top of the Treat Cup.  You can add the candy after wards if it is easier for you.


Now remember the Whisper White 1-3/4" Whisper White card stock circle we had set aside...well we need it now.  This will help to keep the candy inside the Treat Cup when we place it on the front of the card.  Before placing the Whisper White circle over top of the Treat Cup center I made an X in the center of it using the Cutter Tool.  Once you have made an X you can then peel off the backing of the Treat Cup and then place the circle onto the center of it. 


Next center the Pink Pirouette layer over top of the Crumb Cake card front base.  This is how your card should look before putting the balloon basket image on top.  I added some Stampin' Dimesionals to my Whisper White card stock with the balloon basket image to give it some dimension.  Next decorate the card front as you wish. Voila now you have a super cute birthday card with a treat for the birthday gal!  The Treat Cups can be filled with almost anything...buttons, ribbon, sayings, punched out card stock in different shapes, etc. I could go on and on.

Stampin' Up! Supplies used:
Stamp Set: Sweet Centers, Create a Cupcake
Paper: Crumb Cake card stock, Pink Pirouette card stock, Whisper White card stock, Pretty In Pink card stock
Ink: Early Espresso Classic Stampin' Pad
Accessories: Big Shot Die-Cut Machine, Vintage Wallpaper Textured Impressions Embossing Folder, 1-3/4" Circle Punch, Treat Cup, Stampin' Dimesionals, Pretty In Pink 1/8" Tafetta Ribbon, Scallop Border Punch

Happy Stamping!
Michelle B
Independent Stampin' Up! Demonstrator
inspire. create. share.

Sunday, September 18, 2011

Baby Rattle Card


I have recently started back to work full-time.....yes after being at home with my kids for 6 years we (Hubby & I) decided I should give it a try.  It is a HUGE adjustment and am hoping with each passing week that the kids settle more and more in our new routine.  And with each passing week I am hoping to find some consistent stamping time.  I am pretty sure my nights will even out and I won't be so tired and need to go to bed so early.  hehehe  I did manage to find some stamping time tonight!  It seems that I am WAY behind on my baby cards.  Which means I need to find a quick and easy card that I can make a whole bunch of in next to no time.  Those types of cards are my FAV! 

Here is a baby boy card I made using the Button Buddies stamp set.  I guess you could place a button on the "rattle" part of the stamp but I thought that would be a bit silly as then you would loose all of the detail that this image has.  Perhaps I should make one with a button so we can compare.  I will write that on my "Cards I need to make" list.  This card was fairly easy to make.  It isn't that fussy for details and doesn't really have a lot of stamping.  I did color the image with Stampin' Write Markers instead of ink pads so that I could get some different colors.

Stampin' Up! Supplies used:
Stamp Set: Button Buddies, Tiny Tags
Paper: Bashful Blue card stock, Whisper White card stock, Island Indigo card stock
Ink: Bashful Blue Stampin' Write Marker, Chocolate Chip Stampin' Write Marker, Pacific Point Stampin' Write Marker (I don't have the Island Indigo one yet)
Accessories: Big Shot Die-Cut Machine, Perfect Polka Dots Textured Impressions Embossing Folder, Stampin' Dimesionals, Bashful Blue 5/8" Satin Ribbon, 2-3/8" Scallop Circle Punch, 1-3/4" Circle Punch, Jewelery Tag Punch

Happy Stamping!
Michelle B
Independent Stampin' Up! Demonstrator
inspire. create. share.

Wednesday, September 7, 2011

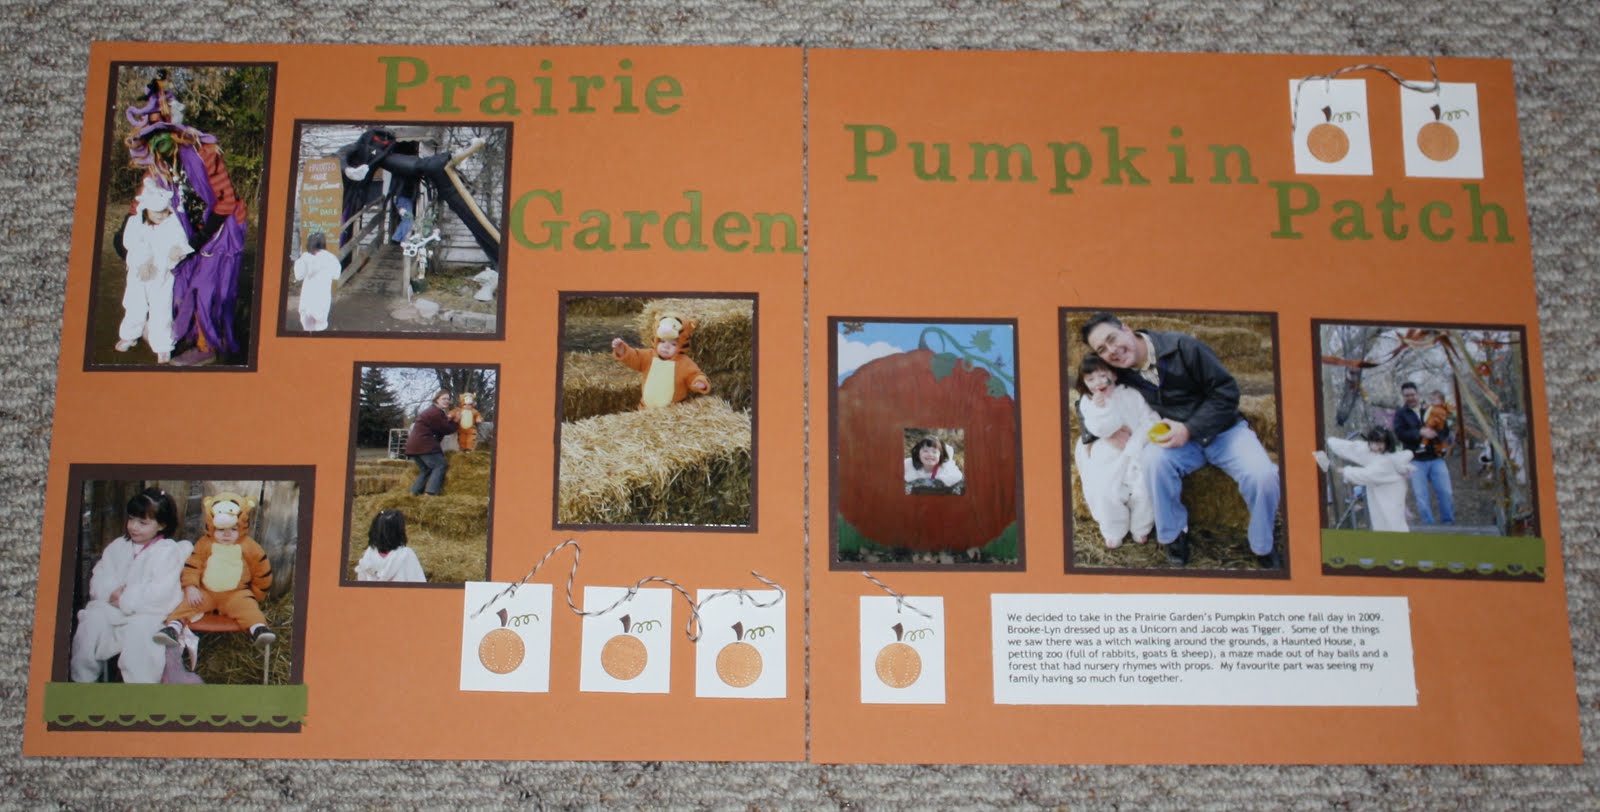
Pumpkin Patch Scrapbook Layout


My 2011 stamping technique & scrapbook club is coming to an end.  Our last meeting is this Sunday.... :o(  Although I did enjoy myself (I always do!!) this year I think next year I am going to change the meetings to every month instead of every 3 month.  That is just too much time in between meetings.  If you are interested in joining My stamping technique & scrapbook club next year please send me an email to register.  We will start in January 2012. 

OK now let's talk about the scrapbook project.  It feels like fall to me...well not during the day but at night so I picked a fall theme for our last club project.  I did tell my members if they wanted to they could pick whatever theme they wanted but they needed to use a stamp from the Button Buddies stamp set.  I also told them that if they wanted to they could also change the color scheme of their layout too.  I can't wait to see what they come up with.

Happy Stamping!
Michelle B
Independent Stampin' Up! Demonstrator
inspire. create. share.

Wednesday, August 31, 2011

September 18 - Christmas card stamp camp

It is that time again.....time to get a head start on your handmade Christmas cards!  I will be hosting 4 Christmas Card Stamps Camps during the Fall/Winter Season.  At each class you will make 12 cards (4 cards of 3 different designs) with matching envelopes. By the last stamp camp in December you will have made 48 Christmas cards.  At each stamp camp there will be a draw for a "stamping surprise".  Attend all 4 Christmas card stamp camps and your name will be entered into a draw on the last class for a great prize....a FREE STAMP SET!

Cost is $25.00 for non-club members or
$22.00 for club members
Class Dates are: September 18, October 8, November 13 & December 3, 2011.
Times: 1:00 p.m. to 3:00 p.m.
RSVP: click here to register via email

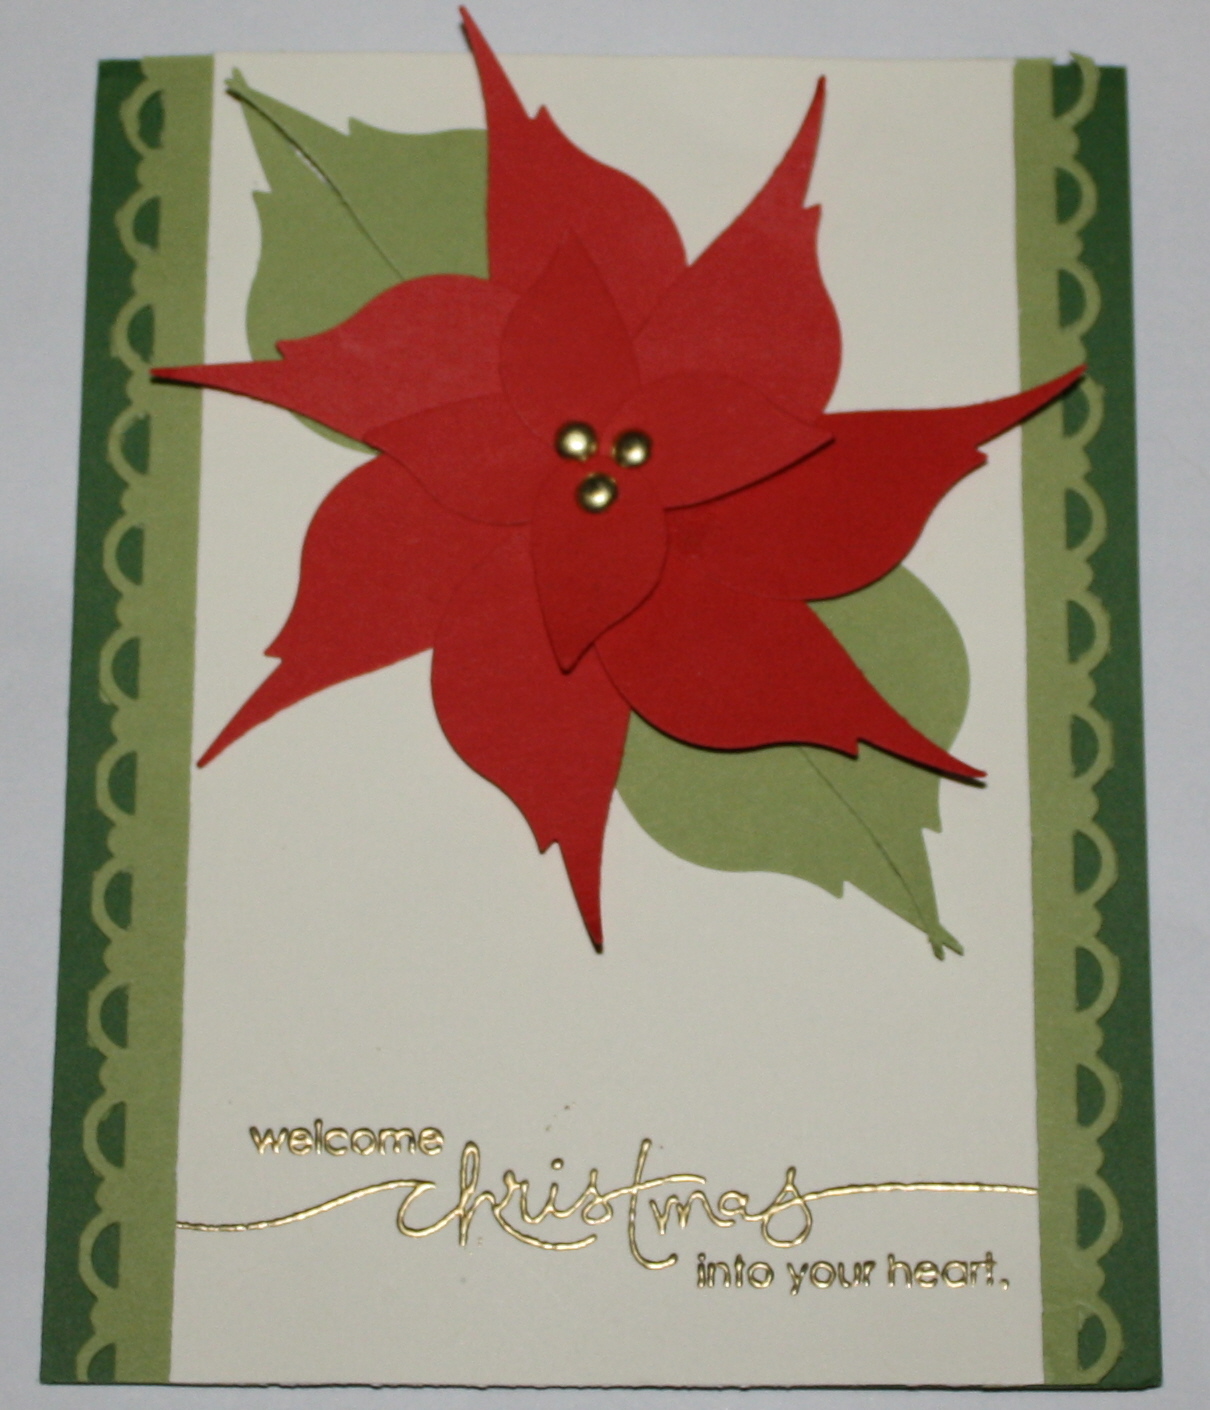
Below are 2 of the 3 designs that we will be making at the September 18 Christmas card stamp camp.  I hope you like them.

Marina Snowflake Card


Poppy Christmas Poinsettia


Happy Stamping!

Michelle B
Independent Stampin' Up! Demonstrator
inspire. create. share.

Friday, August 26, 2011

Clearly for You Birthday card


Another card made using a couple of different images from the Clearly for You stamp set.  Hehehe I like it when you can make a variety of cards using one stamp set.  I needed a birthday card to mail out to my friend so I stamped the words 'happy birthday' on a piece of Whisper White card stock then punched the words out using the Modern Label punch.  I then added a little bling by placing a couple of Rhinestone Jewels on either end of the Modern Label punched out card stock.

Stampin' Up! supplies used:
Stamp set: Clearly for You, Teeny Tiny Wishes
Paper: Calypso Coral card stock, Crumb Cake Textured card stock, Whisper White card stock
Ink: Early Espresso Classic Stampin' Pad
Accessories: Big Shot Die Cut Machine, Vintage Wallpaper Textured Impressions Embossing Folder, Early Espresso 5/8" Satin Ribbon, Scallop Trim Border and Corner Punch, Modern Label Punch, Stampin' Dimensionals

Happy Stamping!
Michelle B
Independent Stampin' Up! Demonstrator
inspire. create. share.

Tuesday, August 23, 2011

Nature Clearly For You card


I have seen many cards with the the different images in the "Clearly For You" stamp set so I thought I would try that idea.  Here is my version.  Here is a card made by Mary Fish that I saw and was inspired by.  Mary used alot of the different images in the Clearly For You card on her card.  Isn't her card gorgeous!?! Mary is such a talented stamper.  I visit her blog often to get inspiraion.  Thanks Mary! 

My card size is 4"-1/2" x 4"-1/2".  Just perfect to add a little note to someone.

Stampin' Up! Supplies used:
Stamp Set: Clearly for You
Paper: Pear Pizzazz card stock, Crumb Cake textured card stock, Whisper White card stock, Early Espresso card stock
Ink; Early Espresso Classic Stampin' Pad
Accessories: Big Shot Die-Cut Machine, Vintage Wallpaper Textured Impressions Embossing Folder, Neutrals Designer Button

Happy Stamping!
Michelle B
Independent Stampin' Up! Demonstrator
inspire. create. share