Friday, December 30, 2011
2012 Stamping Technique Card & Scrapbook Club
This year's club got me thinking, if you are unable to make the time committment of a couple of hours on a Saturday or Sunday every other month then perhaps you would like to participate in this club via email. It will work the same way, you submit your order of $35.00 along with payment each time we meet and I will forward you the supplies to make that club's projects and technique sheet along with step by step instructions. This way you can make each club project at your leisure and still get some scrapbooking and card making done.
Thursday, December 29, 2011
2012 Stamping Technique Card & Scrapbook Club
Michelle's 2012 Stamping Technique Cards & Scrapbook Club
Want to get your creative juices flowing in 2012 or perhaps you want to have some extra hand made cards to have on hand, if so then I have the stamping club for you.
This club will meet every other month for 6 months starting January 22, 2012. At each club meeting we will learn a new stamping technique, make a card or two showcasing this new stamping technique, make a technique sheet as well as create a double layout scrapbook page. Wow! If scrapbooking isn't your thing, not to worry you can always make extra cards!
Each time we meet there will be a new hostess who will receive the hostess benefits for that club meeting. The hostess benefits include hostess dollars that can be spent on exclusive specially-priced hostess products or any catalogue items as well as the chance to earn catalogue items at 50% off. The minimum Stampin' Up! order amount is $35.00. Everyone in the club must place a minimum order for $35.00 so that the hostess benefits can be reached. This order along with payment is due on or before the club meeting date. Sign up with a friend and receive a Stampin' Up! Club Bonus Coupon valued at $15.00.
**Click here to register. You are also welcome to come and join us to see what my Stamping Technique Cards & Scrapbook Club is all about. There will be a $5.00 fee for supplies used or you are welcome to place an order.
Club Member Benefits:
a new Idea Book & Catalogue in July
mini catalogues when they come out
a special thank you surprise at the end of the club
learn new stamping techniques
scrapbooking tips and tricks
stamping technique sheets
Please visit this site frequently to see the January club projects. They will be uploaded really soon.
Happy Stamping!
Michelle B
Independent Stampin' Up! Demonstrator
inspire. create. share.
Wednesday, December 14, 2011
Gold Ornaments

Now that my stamp camps are finished for the year I really need to get a move on finishing up my Christmas cards. The inspiration for this card came from Mary Fish's blog. I was recently on Mary's blog and saw an a card that she had made using the Pendant Park stamp set gold embossed on circles which were ornaments. Mary's card was simply stunning. I guess you could say this is my version of her card. Thanks Mary for your inspiration! I usually don't stray very far from Stampin' Up! products but for this card I did. One of my Mom's friends gave her a bunch of ribbon to pass along to me....Thanks Diane! I immediately thought I am going to make a card for her using this gold weave ribbon. Here is the card I made for her. I had to make a bunch of these as they were easy to make.
I will be starting up a new Stamping Technique Club in January be sure to check my "Clubs" link often for more details. I would love for you to join us.
Stampin' Up! products used:
stamp set: Baroques Motif, Many Merry Messages
Paper: Very Vanilla card stock
Ink: VersaMark Pad
Accessories: Gold Embossing Powder, Heat Gun, Stampin' Dimensionals, Big Shot Die Cut Machine, Stocking Accents Original Die
Happy Stamping!
Michelle B
Independent Stampin' Up! Demonstrator
inspire. create. share.
Monday, December 5, 2011
Doily Snowflake Card - Dec 11 Stamp Camp

Here is the final card and tag design for my last Christmas card stamp camp on Sunday, December 11, 2011 from 1:00 to 3:00. I hope you can join me for some Christmas card stamping fun! The card and the matching tag use Doilies from the Flirtatious Specialty DSP. Aren't they cute!?! Who would have ever thought you could make a snowflake out of a doily? A couple of more products used on the card are the Mica Flakes, Window Sheets and Shaker Frames. I got this card idea from a talented Stampin' Up! Demonstrator that is in my weCANstamp group. Thanks Gail for your inspiration.
Stamp Camp details....
When: Sunday, December 11, 2011
Where: My house (address and directions will be given upon registeration)
Time: 1:00 p.m. to 3:00 p.m.
Cost: $25.00 for non club members, $22.00 for club members
RSVP: click here to register via email
Stampin' Up! supplies used:
Stamp sets: Many Merry Messages, Sincere Salutations
Paper: Bashful Blue card stock, Not Quite Navy card stock, Flirtatious Specialty DSP
Ink: VersaMark Pad
Accessories: Window Sheets, Shaker Frames, Mica Flakes, Big Shot, Two Tag Bigz Die, 5/8" Bashful Blue Satin Ribbon, Whisper White 1/4" Grosgrain Ribbon, Scissors, Basic Jewel Rhinestone, White Embossing Powder, Heat Gun
Happy Stamping!
Michelle B
Independent Stampin' Up! Demonstrator
inspire. create. share.
Sunday, December 4, 2011
Merry Christmas Rosette snowflake card - December 11 Stamp Camp

Here is the second card design that will be featured at my Christmas card and tag stamp camp on December 11. Yup the date has been moved. We had a couple of sick kids last week so no time to stamp or prepare for a stamp camp. I hope you will join me on the new last stamp camp date December 11, 2011 from 1:00 to 3:00 p.m. Click here to register via email.
The rosettes are fun to make. I didn't find them easy, perhaps with practice they will be come easier. I also don't own the Scoring Tool so that may just be my next purchase or a Christmas present. If you have any stamping items on your Christmas wish list be sure and tell your family and friends that they can order these items online on my Stampin' Up! Demonstrator website.
Stampin' Suppies used:
Stamp Sets: Serene Snowflake, Four the Holidays
Paper: Not Quite Navy card stock, Pool Party card stock, Crumb Cake card stock, Whisper White card stock
Ink: Not Quite Navy Classic Stampin' Pad, Whisper White Craft Ink
Accessories: White/White Baker's Twine, 2-3/8" Scallop Circle Punch, Lace Border Ribbon Punch, Jewelery Tag Punch, Dazzling Diamonds Glitter, Basic Rhinestone Jewels, Scoring Blade on Paper Cutter
Happy Stamping!
Michelle B
Independent Stampin' Up! Demonstrator
inspire. create. share.
Monday, November 21, 2011
Silver Christmas Tree & Tag Combo - Dec 11 Christmas card stamp camp

I hope all of you are doing well and staying warm. I have been busily creating over the last couple of weeks. I apologize for not uploading some of my creations sooner. heheh Life has gotten away with me again. The above combo will be one of the Christmas card designs along with matching Christmas tag that we will be making at my last Christmas card stamp camp on December 11, 2011. Can you believe it is the last one!?! Time sure flies by when you are having fun.
Please join me for a couple of hours of stamping fun on Sunday, December 11, 2011 from 1:00 to 3:00. At this final Christmas card stamp camp we will be doing something a little different. Not only will you be making 12 Christmas cards (4 each of 3 different designs) but you will also make a matching Christmas tag for one of the 3 designs. There is no extra cost for the matching tags. You can RSVP for this last Christmas card stamp camp by sending me an email here.
Please visit often to see the other 2 Christmas card designs and matching tags that we will be making at my final Christmas Card stamp camp on December 3. One of those Christmas card designs will be featuring Stampin' Up!'s Holiday Mini products. The Shaker Frames found on page 38 in the Holiday Mini and the Mica Flakes found on pg 21 in the Holiday Mini. This card will be uploaded early next week.
Stampin' Up! Products used:
Stamp sets: Teeny Tiny Wishes, Tiny Tags
Paper: Whisper White card stock, Real Red card stock, Silver Glimmer Paper
Ink: Real Red Classic Stampin' Pad
Accessories: Big Shot Die-Cut Machine, Vintage Wallpaper Textured Impressions Embossing Folder, Stocking Accents Originals Die, Cherry Cobbler/White Baker's Twine, Stampin' Dimesionals, Create a Cupcake Punch, Jewellery Tag Punch, Modern Label Punch
Happy Stamping!
Michelle B
Independent Stampin' Up! Demonstrator
inspire. create. share.
Tuesday, November 8, 2011
Season's Greetings Holly card

The Red Glimmer Paper is quickly becoming one of my favs. What a great paper to use for Christmas cards. If you don't have some I would suggest getting some. The paper is a great price - $5.95 for 2 12" x 12" sheets. My next card will feature the Silver Glimmer Paper. Ack I can't wait to play with that new product. hehehe I get so excited. This card is the second design that will be featured at my November 13 Christmas card stamp camp. I can't believe there are only 2 Christmas card stamp camps left - where did the time go. If you want to make some handmade Christmas cards this year please join me for a couple of hours of stamping fun on November 13 between 1:00 and 3:00. You can RSVP here by sending me an email. The cost is $25.00 for non-club members or $22.00 for club members. We will be making 12 Christmas cards (4 each of 3 different designs) using the new Stocking Accents Original Die found on page 24 in the Holiday Mini. There will also be a draw for a "stamping" surprise.
Stampin' Up! Supplies used:
Stamp Set: Many Merry Messages
Paper: Pear Pizzazz card stock, Whisper White card stock, Real Red card stock, Red Glimmer Paper
Ink: VersaMark
Accessories: Big Shot Die-Cut Machine, Perfect Polka Dots Textured Impressions Folder, Stocking Accents Original Die, Gold Embossing Powder, Heat Gun, Stampin' Dimensionals, Scallop Border Punch
Happy Stamping!
Michelle B
Independent Stampin' Up! Demonstrator
inspire. create. share.
Thursday, November 3, 2011
A Candy Cane for the Holidays!
It seems like forever since I have posted a card. Sorry about that....life has been a bit busy! Last week I received an order and in that order was some new Stampin' Up! products from the Holiday Mini. Amongst those new products was Stampin' Up!'s new Stocking Accents Original Die. You can find this die on page 24 of the Holiday Mini. The cards at my next November 13 Christmas Card Stamp Camp are all made using this die. We will be making 12 cards (4 each of 3 different designs) using this die as well as different products from the Holiday Mini Catalogue. Here is the 1st card design for my November 13 Christmas card stamp camp. I hope you will join me for some Christmas card stamping fun!

Cost is $25.00 for non-club members or $22.00 for club members
Class Dates: November 13 & December 3, 2011
Time: 1:00 p.m. to 3:00 p.m.
RSVP: click here to register via email
Stampin' Up! Supplies used:
Stamp Set: Four the Holidays
Paper: Pear Pizzazz card stock, Whisper White card stock, Red Glimmer Paper
Ink: VersaMark
Accessories: Big Shot Die-Cut Machine, Perfect Polka Dots Textured Impressions Folder, Stocking Accents Original Die, Gold Embossing Powder, Real Red 5/8" Satin Ribbon, Stampin' Dimensionals, Heat Gun, Scallop Edge Border Punch
Happy Stamping!
Michelle B
Independent Stampin' Up! Demonstrator
inspire. create. share.

Stamp Camp Details...........
You will make 12 cards (4 each of 3 different designs) including envelopes.
Cost is $25.00 for non-club members or $22.00 for club members
Class Dates: November 13 & December 3, 2011
Time: 1:00 p.m. to 3:00 p.m.
RSVP: click here to register via email
Stampin' Up! Supplies used:
Stamp Set: Four the Holidays
Paper: Pear Pizzazz card stock, Whisper White card stock, Red Glimmer Paper
Ink: VersaMark
Accessories: Big Shot Die-Cut Machine, Perfect Polka Dots Textured Impressions Folder, Stocking Accents Original Die, Gold Embossing Powder, Real Red 5/8" Satin Ribbon, Stampin' Dimensionals, Heat Gun, Scallop Edge Border Punch
Happy Stamping!
Michelle B
Independent Stampin' Up! Demonstrator
inspire. create. share.
Saturday, October 22, 2011
Another Button Buddies baby card

The baby rattle in the Button Buddies card makes a great focal point for this card. The second layer of this card was texturized using the Backgrounds #1 Textured Plates. The Very Vanilla cardstock that the blue rattle was stamped on was cut out using the Big Shot Die-Cut Machine and the Scallop Rectangle Clearlit Die. These cards are quick and easy to make with not a lot of fuss. I am running low and need to make somre more to have on hand.
Stampin' Up! Supplies used:
Stamp Set: Button Buddies, Teeny Tiny Wishes
Paper: Bashful Blue card stock, Very Vanilla card stock
Ink: Bashful Blue Stampin' Write Marker, Pacific Point Stampin' Write Marker, Early Espresso Stampin' Write Marker
Accessories: Bashful Blue 3/8" Satin Ribbon, Stampin' Dimensionals, Scallop Rectangle Clearlit die, Background #1 Textured Plates, Big Shot Die-Cut Machine
Happy Stamping!
Michelle B
Independent Stampin' Up! Demonstrator
inspire. create. share.
Thursday, October 13, 2011
Sparkly Glimmery Noel Stockings card

A Christmas card stamp camp could not be complete without shiny, sparkly red Christmas stockings! Here is the 3rd card that my stamping friends will be making on Saturday, October 15 from 1:00 to 3:30 (please note date has changed from previous October stamp camp post).
This Noel Stockings card was made using a some stamping items from Stampin' Up!'s Holiday Mini catalogue.....Mini Jingle Bells foundon page 30 (48 bells from $3.95 - wow!), Stocking Builder Punch found on page 34 and Red Glimmer Paper found on page 41. The Red Glimmer Paper is an amazing price. You get 2 sheets of 12" x 12" Red Glimmer Paper for only $5.95. I hope my stamping friends enjoy making this Sparkly Glimmery Stocking Christmas card as much as I did.
Stampin' Up! Supplies used:
Stamp Set: Many Merry Messages
Paper: Pear Pizzazz card stock, Very Vanilla card stock, Red Glimmer Paper, Red Riding Hood card stock
Ink: Early Espresso Classic Stampin' Pad
Accessories: Big Shot Die-Cut Machine, Perfect Polka-Dots Textured Impressions Embossing Folder, Linen Thread, Stockings Builder Punch, Mini Jingle Bells, Stampin' Dimensionals, Neutral Brads, Designer Label Punch, Red Riding Hood 3/8" Taffeta Ribbon
Happy Stamping!
Michelle B
Independent Stampin' Up! Demonstrator
inspire. create. share.
Wednesday, October 5, 2011
For You Days of Gratitude card

Here is a card that I made for one of my friends at work. It was her last day today and to celebrate her new venture I made her a "for you" (instead of good-bye) card. All of us at work signed the inside of it. I hope she liked it.
This card was made using the Days of Gratitude stamp set and a bunch of Stampin' Write Markers. First I colored the whole image with a Peach Parfait Stampin' Write Marker, I then went some of the stamp with an Old Olive Stampin' Write Marker and then finally colored the edge with a Chocolate Chip Stampin' Write Marker. It turned out to be a fall colored card which I think suits the big stamp perfectly.
Stampin' Up! supplies used:
Stamp sets: Days of Gratitude, Teeny Tiny Wishes
Paper: Crumb Cake card stock, Choclate Chip card stock, Very Vanilla card stock, Pear Pizzazz card stock
Ink: Peach Parfait Stampin' Write Marker, Old Olive Stampin' Write Marker, Chocolate Chip Stampin' Write Marker
Accessories: Scallop Border Punch, Stampin' Dimensionals, Antique Brad, Paper Piercer, Jewellery Tag Punch, Pumpkin Pie 1-1/4" Striped Grosgrain Ribbon (retired).
Happy Stamping!
Michelle B
Independent Stampin' Up! Demonstrator
inspire. create. share.
Saturday, October 1, 2011
October 15 Christams Card Stamp Camp

Merry Christmas Sparkly Wreath card
On Saturday, October 15, 2011 from 1:00 to 3:30 p.m. I will be hosting my second Christmas Card Stamp Camp. Please come and join me for a couple of hours of stamping fun. You will be making 12 Christmas cards (4 each of 3 different designs) and matching envelopes. At each stamp camp there will be a draw for a "stamping surprise". If you attend all 4 Christmas card stamp camps and your name will be entered into a draw on the last class for a great prize....a FREE STAMP SET!
Stamp Camp Details...........
Cost is $25.00 for non-club members or $22.00 for club members
Class Dates: September 18, October 15, November 13 & December 3, 2011.
Time: 1:00 p.m. to 3:00 p.m.
RSVP: click here to register via email

Season's Greetings Snowflake card
The inspiration for the above snowflake card came from an amazing Halloween card that the talented Mary Fish did. Thanks Mary for your inspiration!
Happy Stamping!
Michelle B
Independent Stampin' Up! Demonstrator
inspire. create. share.
Thursday, September 22, 2011
Sweet Centers Balloon Birthday Card

I needed to have a birthday card ready for tomorrow and here is what I ended up making tonight. Isn't it fun! I was looking through my birthday stamp sets and this one popped out at me....It is the Sweet Centers ( 116521) stamp set. I can honestly say I don't think I have ever made a birthday card with this stamp set. Well now I guess I can't say that anymore. Haha! When putting candy in a card like this one you need to make sure that the recepient of the card is able to get the candy out after. I did this in 2 ways. I took my Cutter Kit (106958) and made an X in the Crumb Cake card stock as well as on a piece of Whisper White card stock. Now all the birthday gal has to do it open both piece of card stock where the X is and voila she has a little yummy treat on her birthday. Here are some pics to show and directions on how I made this card....

Make a 1-3/4" circle in a piece of Whisper White card stock. Make sure the edges of the Whisper White card stock is small enough to center the punched out circle. Set the punched out circle aside as we will be using it later. Next stamp the Balloon Basket image from the Sweet Centers stamp set using a Early Espresso Classic Stampin' Pad.

I put the Whisper White card stock with the balloon basket image on top of a piece of Pink Pirouette card stock and then traced the 1-3/4" circle on to it. Because the Pink Pirouette card stock had wider edges I could not use the same Punch that I did on the Whisper White card stock. Instead I had to use my Circle Scissor Plus to make the hole here.

Next I placed the Pink Pirouette card stock onto the center of the Crumb Cake card front base so that I could make an X in the center of the circle so that the candy could be easily accessible. I made the X using the perforation tool in the Cutter Kit.

I then placed the Whisper White card stock on top of the Pink Pirouette card stock to see what the card would look like. I did not adhere it down yet. I then put some Smarties inside the Treat Cup. I then took everything apart and placed the Pink Pirouette card stock over top of the Treat Cup. You can add the candy after wards if it is easier for you.


Next center the Pink Pirouette layer over top of the Crumb Cake card front base. This is how your card should look before putting the balloon basket image on top. I added some Stampin' Dimesionals to my Whisper White card stock with the balloon basket image to give it some dimension. Next decorate the card front as you wish. Voila now you have a super cute birthday card with a treat for the birthday gal! The Treat Cups can be filled with almost anything...buttons, ribbon, sayings, punched out card stock in different shapes, etc. I could go on and on.
Stampin' Up! Supplies used:
Stamp Set: Sweet Centers, Create a Cupcake
Paper: Crumb Cake card stock, Pink Pirouette card stock, Whisper White card stock, Pretty In Pink card stock
Ink: Early Espresso Classic Stampin' Pad
Accessories: Big Shot Die-Cut Machine, Vintage Wallpaper Textured Impressions Embossing Folder, 1-3/4" Circle Punch, Treat Cup, Stampin' Dimesionals, Pretty In Pink 1/8" Tafetta Ribbon, Scallop Border Punch
Happy Stamping!
Michelle B
Independent Stampin' Up! Demonstrator
inspire. create. share.
Sunday, September 18, 2011
Baby Rattle Card

I have recently started back to work full-time.....yes after being at home with my kids for 6 years we (Hubby & I) decided I should give it a try. It is a HUGE adjustment and am hoping with each passing week that the kids settle more and more in our new routine. And with each passing week I am hoping to find some consistent stamping time. I am pretty sure my nights will even out and I won't be so tired and need to go to bed so early. hehehe I did manage to find some stamping time tonight! It seems that I am WAY behind on my baby cards. Which means I need to find a quick and easy card that I can make a whole bunch of in next to no time. Those types of cards are my FAV!
Here is a baby boy card I made using the Button Buddies stamp set. I guess you could place a button on the "rattle" part of the stamp but I thought that would be a bit silly as then you would loose all of the detail that this image has. Perhaps I should make one with a button so we can compare. I will write that on my "Cards I need to make" list. This card was fairly easy to make. It isn't that fussy for details and doesn't really have a lot of stamping. I did color the image with Stampin' Write Markers instead of ink pads so that I could get some different colors.
Stampin' Up! Supplies used:
Stamp Set: Button Buddies, Tiny Tags
Paper: Bashful Blue card stock, Whisper White card stock, Island Indigo card stock
Ink: Bashful Blue Stampin' Write Marker, Chocolate Chip Stampin' Write Marker, Pacific Point Stampin' Write Marker (I don't have the Island Indigo one yet)
Accessories: Big Shot Die-Cut Machine, Perfect Polka Dots Textured Impressions Embossing Folder, Stampin' Dimesionals, Bashful Blue 5/8" Satin Ribbon, 2-3/8" Scallop Circle Punch, 1-3/4" Circle Punch, Jewelery Tag Punch
Happy Stamping!
Michelle B
Independent Stampin' Up! Demonstrator
inspire. create. share.
Wednesday, September 7, 2011
Pumpkin Patch Scrapbook Layout
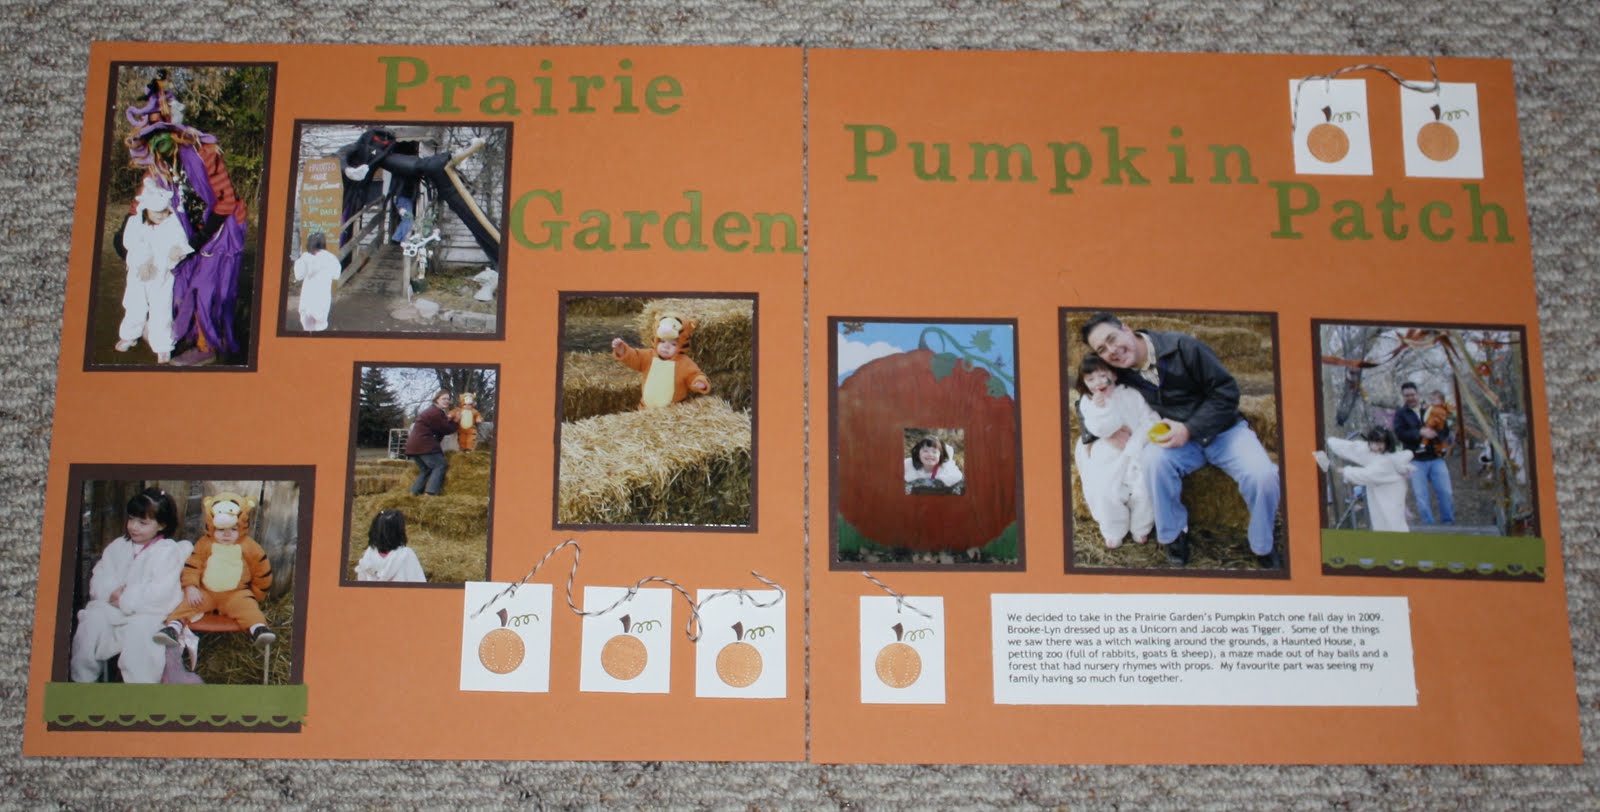
My 2011 stamping technique & scrapbook club is coming to an end. Our last meeting is this Sunday.... :o( Although I did enjoy myself (I always do!!) this year I think next year I am going to change the meetings to every month instead of every 3 month. That is just too much time in between meetings. If you are interested in joining My stamping technique & scrapbook club next year please send me an email to register. We will start in January 2012.
OK now let's talk about the scrapbook project. It feels like fall to me...well not during the day but at night so I picked a fall theme for our last club project. I did tell my members if they wanted to they could pick whatever theme they wanted but they needed to use a stamp from the Button Buddies stamp set. I also told them that if they wanted to they could also change the color scheme of their layout too. I can't wait to see what they come up with.
Happy Stamping!
Michelle B
Independent Stampin' Up! Demonstrator
inspire. create. share.
Wednesday, August 31, 2011
September 18 - Christmas card stamp camp
It is that time again.....time to get a head start on your handmade Christmas cards! I will be hosting 4 Christmas Card Stamps Camps during the Fall/Winter Season. At each class you will make 12 cards (4 cards of 3 different designs) with matching envelopes. By the last stamp camp in December you will have made 48 Christmas cards. At each stamp camp there will be a draw for a "stamping surprise". Attend all 4 Christmas card stamp camps and your name will be entered into a draw on the last class for a great prize....a FREE STAMP SET!
Cost is $25.00 for non-club members or
$22.00 for club members
Class Dates are: September 18, October 8, November 13 & December 3, 2011.
Times: 1:00 p.m. to 3:00 p.m.
RSVP: click here to register via email
Below are 2 of the 3 designs that we will be making at the September 18 Christmas card stamp camp. I hope you like them.
Marina Snowflake Card

Poppy Christmas Poinsettia

Happy Stamping!
Michelle B
Independent Stampin' Up! Demonstrator
inspire. create. share.
Friday, August 26, 2011
Clearly for You Birthday card
Another card made using a couple of different images from the Clearly for You stamp set. Hehehe I like it when you can make a variety of cards using one stamp set. I needed a birthday card to mail out to my friend so I stamped the words 'happy birthday' on a piece of Whisper White card stock then punched the words out using the Modern Label punch. I then added a little bling by placing a couple of Rhinestone Jewels on either end of the Modern Label punched out card stock.
Stampin' Up! supplies used:
Stamp set: Clearly for You, Teeny Tiny Wishes
Paper: Calypso Coral card stock, Crumb Cake Textured card stock, Whisper White card stock
Ink: Early Espresso Classic Stampin' Pad
Accessories: Big Shot Die Cut Machine, Vintage Wallpaper Textured Impressions Embossing Folder, Early Espresso 5/8" Satin Ribbon, Scallop Trim Border and Corner Punch, Modern Label Punch, Stampin' Dimensionals
Happy Stamping!
Michelle B
Independent Stampin' Up! Demonstrator
inspire. create. share.
Tuesday, August 23, 2011
Nature Clearly For You card
I have seen many cards with the the different images in the "Clearly For You" stamp set so I thought I would try that idea. Here is my version. Here is a card made by Mary Fish that I saw and was inspired by. Mary used alot of the different images in the Clearly For You card on her card. Isn't her card gorgeous!?! Mary is such a talented stamper. I visit her blog often to get inspiraion. Thanks Mary!
My card size is 4"-1/2" x 4"-1/2". Just perfect to add a little note to someone.
Stampin' Up! Supplies used:
Stamp Set: Clearly for You
Paper: Pear Pizzazz card stock, Crumb Cake textured card stock, Whisper White card stock, Early Espresso card stock
Ink; Early Espresso Classic Stampin' Pad
Accessories: Big Shot Die-Cut Machine, Vintage Wallpaper Textured Impressions Embossing Folder, Neutrals Designer Button
Happy Stamping!
Michelle B
Independent Stampin' Up! Demonstrator
inspire. create. share
Monday, August 22, 2011
In-Colors Button card

Stampin' Up! supplies used:
Stamp Sets: Buttons, Buttons, Clearly for You
Paper: Poppy Parade card stock, Peach Parfait card stock, Pear Pizzazz card stock, Soft Suede card stock, Very Vanilla card stock
Ink: Poppy Parade Classic Stampin' Pad, Peach Parfait Classic Stampin' Pad, Pear Pizzazz Classic Stampin' Pad, Early Espresso Classic Stampin' Pad
Accessories: Neutrals Designer Buttons, Very Vanilla Taffeta Ribbon
Happy Stamping!
Michelle B
Independent Stampin' Up! Demonstrator
inspire. create. share.
Friday, August 19, 2011
Hello Button Buddies Flower Card

Stampin' Up! Supplies used:
Stamp Set: Button Buddies, Tiny Tags
Paper: Wild Wasabi card stock, Crumb Cake cards tock, Whisper White card stock, Early Espresso card stock
Ink: VersaMark Pad, Early Espresso Classic Stampin' Pad, Garden Green Stampin' Write Marker
Accessories: Big Shot Die-Cut Machine, Perfect Polka Dots Textured Impressions Embossing Folder, Elegant Lines Textured Impressions Embossing Folder, Neutrals Designer Buttons, Early Espresso 5/8" Satin Ribbon, Stampin' Dimensionals, Crimper, Scallop Trim Border Punch, Jewellry Tag Punch
Happy Stamping!
Michelle B
Independent Stampin' Up! Demonstrator
inspire. create. share.
Thursday, August 18, 2011
A little house card

To make the green grass I just did random cuts along a piece of Pear Pizzazz card stock using my scissors.
I am going to use this card as one of the sample real estate cards that I sell to real estate agents. It will be upoloaded to my INKspired Greetings & Baby Things! blog. If you want to check that out the address is http://www.inkspiredgreetings.blogspot.com/. I also noticed that we have a new neighbour just down the street from us. This card might make her feel welcome. Hehehe I love surprising people with handmade cards.
Stampin' Up! Supplies used:
Stamp Set: Tiny Tags, En Francais
Paper: Crumb Cake card stock, Pear Pizzazz card stock, Poppy Parade card stock, Baja Breeze card stock, Very Vanilla card stock, Early Espresso Textured & Smooth card stock
Ink: Early Espresso Classic Stampin' Pad
Accessories: Paper Crimper, Scallop Edge Border Punch, Neutral Glitter Brads, Oval Punch, Jewellery Tag Punch, Old Olive 1/8" Taffeta Ribbon
Happy Stamping!
Michelle B
Independent Stampin' Up! Demonstrator
inspire. create. share.
Wednesday, August 17, 2011
Poppy Parade Button Buddies card

This time instead of placing Pearls in the inside of each flower I used VersaMark, Heat & Stick powder and then Dazzling Diamonds Glitter. I liked the way this turned out. You might have to click on the image to make it bigger so that you can see the sparkly centres of the flowers. This stamp set makes for some quick and easy cards. This card layout isn't hard to re-create either. Now I just need to find someone to send this to.
Stampin' Up! Supplies used:
Stamp Set: Button Buddies, Perfect Words (hostess)
Paper: Poppy Parade card stock, Pear Pizzazz card stock, Whisper White card stock
Ink: Poppy Parade Stampin' Write Marker, Pear Pizzazz Stampin' Write Marker, Early Espresso Stampin' Write Marker, VersaMark pad
Accessories: Big Shot Die-Cut Machine, Framed Tulip Textured Impressions Embossing Folder, Heat Gun, Heat & Stick Powder, Dazzling Diamonds Glitter, Itty Bitty Buttons
Happy Stamping!
Michelle B
Independent Stampin' Up! Demonstrator
inspire. create. share.
Tuesday, August 16, 2011
You're the Best Pink Pig card

Another card made with the Button Buddies and Perfect Words stamp set. Isn't the pink pig cute with a button nose? The Pretty in Pink card stock is paper crimped. I need to use that tool more often.
Stampin' Up! Supplies used:
Stamp Set: Button Buddies, Perfect Words (Hostess)
Paper: Pink Pirouette card stock, Pretty in Pink card stock, Whisper White card stock, Crumb Cake card stock
Ink: Pink Pirouette Classic Stampin' Pad, Early Espresso Classic Stampin' Pad
Accessories: Paper Crimper, Scallop Trim Border and Corner Punch, Stampin' Dimensionals, Early Espresso 1/4" Grosgrain Ribbon, Subltes Designer Buttons
Happy Stamping!
Michelle B
Indpendent Stampin' Up! Demonstrator
inspire. create. share.
Saturday, August 13, 2011

Another card I made using the flower image from the Button Buddies stamp set. For some reason I can't not make myself put a button in the center of the flower. I like the way the center looks without one. I embossed the flower image with White Embossing Powder on Crumb Cake card stock and then sponged Early Espresso Classic Ink over top. This technique made the white flower image "pop". The sentiment is from the Perfect Words hostess stamp set.
Stampin' Up! Supplies used:
Stamp Set: Button Buddie, Perfect Words
Paper: Early Espresso card stock and textured card stock, Pear Pizzazz card stock, Crumb Cake card stock, Whisper White card stock
Ink: VersaMark Pad, Early Espresso Classic Stampin' Pad
Accessories: Heat Gun, Scallop Trim Border Punch, Scallop Trim Corner Punch, Stampin' Dimensionals, White Embossing Powder, Bright Brads
Happy Stamping!
Michelle B
Independent Stampin' Up! Demonstrator
inspire. create. share.
Friday, August 12, 2011
Peach Parfait Button Buddies Card

Stampin' Up! Supplies used:
Stamp Sets: Button Buddies, Perfect Words (Hostess)
Paper: Very Vanilla card stock, Peach Parfait card stock, Pear Pizzazz card stock
Ink: Peach Parfait Stampin' Write Marker, Pear Pizzazz Stampin' Write Marker, Early Espresso Stampin' Write Marker
Accessories: Big Shot Die-Cut Machine, Framed Tulip Border Textured Impressions Folder, Basic Pearls Jewels, Stampin' Dimensionals
Happy Stamping!
Michelle B
Independent Stampin' Up! Demonstrator
inspire. create. share.
Thursday, August 4, 2011
Two Owls thank you card

Ohh it takes a bit to get back into the groove of things after going away on holidays. I came home to a nice big box of ribbon. hehehe the ribbon I had ordered for my ribbon assortment. Now that that is all cut and in envelopes for my stamping friends I was able to sit down and make a couple of cards. This card was made for a friend of mine who I visited in B.C. at the end of June. My Dad and I went on a trip just the two of us to visit family and friends in B.C. I haven't seen these friends in a long time. It was nice to have lunch at their house and see their children. She told me that she liked owls so here is an owl card that I made for her using the Two Step XL Owl Punch! This is a wonderful punch as you have everything right there to make your owl. You may be seeing more cards using this punch in the near future.
Stampin' Up! Supplies used:
Stamp Sets: Because I Care (retired hostess level 1)
Paper: Sahara Sand card stock, Whisper White card stock, Pear Pizzazz card stock, Early Espresso card stock, Basic Black card stock, Sweet Pea Designer Series Paper (retired)
Ink: Early Espresso Classic Stampin' Pad
Accessories: Scallop Edge Border Punch, Two Step XL Owl Punch, Two Step XL Bird Punch, Modern Label Punch, Stampin' Dimensionals
Happy Stamping!
Michelle B
Independent Stampin' Up! Demonstrator
inspire. create. share.
Saturday, July 30, 2011
I am baaack....
from Holidays! My family and I had a nice little get away last week. We arrived home last night and are trying to get back into our routine. While away we visited a bunch of neat places and took a large amount of photos. hehehe I guess some much needed scrapbooking is in store for my near future. I will try and get something posted asap for you.
Happy Stamping!
Michelle B
Independent Stampin' Up! Demonstrator
inspire. create. share.
Happy Stamping!
Michelle B
Independent Stampin' Up! Demonstrator
inspire. create. share.
Sunday, July 24, 2011
The Open Sea birthday

Yesterday at my the Open Sea Stamp Camp I realized that I hadn't made one of my good friend's husband a birthday card. Here is the card I made for him yesterday while the ladies were stamping away. This stamp set is wonderful for masculine cards as you can see. It is very versatile with the images that are included in it. When I have some time (after holidays) I will have to sit down and make a bunch of masculine cards with this set so that I have some on hand. The 'happy birthday' saying for this card was taken from the 'best dad ever' stamp set.
Stampin' Up! supplies used:
Stamp set: The Open Sea, Best Dad Ever
Paper: Whisper White card stock, Nautical Expedition Designer Series Paper, Early Espresso card stock
Ink: Crumb Cake Classic Stampin' Pad, Basic Gray Classic Stampin' Pad, Pacific Point Stampin' Write Marker
Accessories: Brights Brad, Scallop Edge Border Punch, Stampin' Dimensionals
Happy Stamping!
Michelle B
Independent Stampin' Up! Demonstrator
inspire. create. share.
Wednesday, July 20, 2011
Calypso Coral Button Buddies Card

Have you had a chance to look through Stampin' Up!'s new Idea Book & Catalogue.....if so I am sure you have seen the Button Buddies stamp set on page 71 - isn't this the cutest set. It has a neat arrangements of stamps and the pig one is adorable. Here is the flower image taken from that set and embossed in clear embossing powder on Whisper White card stock and then sponged with Calypso Coral Classic Ink on the petals of the flower and Early Espresso Classic Ink in the centre. I needed a quick "thanks" card and this was it. The Tiny Tags stamp set is quickly becoming a "word" fav for me. I think the stamped words punched out with the Jewellery Tag punch adds the cutest finishing touch.
Stampin' Up!' Supplies
Stamp Sets: Button Buddies, Tiny Tags
Paper: Calypso Coral card stock, Early Espresso Textured card stock, Whisper White card stock
Ink: VersaMark Pad, Calypso Coral Classic Stampin' Pad, Early Espresso Classic Stampin' Pad
Accessories: Big Shot Die-Cut Machine, Perfect Polka-Dots Textured Impressions Folder, Scallop Edge Border Punch, Whisper White 1/8" Taffeta Ribbon, Jeweller Tag Punch, Neutral Brads, Clear Embossing Powder, Heat Gun, Stampin' Dimesionals
Happy Stamping!
Michelle B
Independent Stampin' Up! Demonstrator
inspire. create. share.
Saturday, July 16, 2011
In-Color Flowers

Last week was a bit of a busy one and I didn't get much time to sit down and create. Now that our busy week of camps is finished, this week will be a bit different. :) This card features 4 of Stampin' Up!'s new in-colors. The card base is Pool Party, a nice refreshing light color. The 3 flowers starting from the left are Calypso Coral, Lucky Limeade and Wisteria Wonder. To give these flowers a little bit of dimension I raised the centers. To do this I first stamped each flower in the new in-colors (Calypso Coral, Lucky Limeade and Wisteria Wonder) in a row on a piece of Very Vanilla card stock. I then stamped the centers of each flower on a different piece of Very Vanilla card stock using my Early Espresso Stampin' Write Marker. I then cut each Early Espresso flower center out put a Stampin' Dimensional on it's back and placed in the middle of each flower. I didn't put a sentiment on it because I wasn't sure what type of card I wanted this to be when I need to use it. It looks like a good friendship card to me.
Stampin' Up!' supplies used:
Stamp Set: Friends Never Fade
Paper: Pool Party card stock, Crumb Cake card stock, Early Espresso card stock, Very Vanilla card stock
Ink: Early Espresso Stampin' Write Marker, Calypso Coral Classic Stampin' Pad, Lucky Limeade Classic Stampin' Pad, Wisteria Wonder Classic Stampin' Pad
Accessories: Big Shot Die-Cut Machine, Vintage Wallpaper Textured Impressions Embossing Folder, Stampin' Dimesionals, 5/8" Early Espresso Satin Ribbon
Happy Stamping!
Michelle B
Independent Stampin' Up! Demonstrator
inspire. create. share.
Check out "The Open Sea & Word Play" stamp camp I am hosting on July 23, 2011 - there are still spots available...register today!
Monday, July 11, 2011
Enjoying Calypso Coral

The other day my friend Val came over to look over the new catalogue with me. We were flipping through the catalogue and we came across the Fifth Avenue Floral card on page 110 in the new Idea Book & Catalogue. Val said I really like that card but wasn't sure how to get the same effect as the popped out flower. My eyes twinkled and I said let's go downstairs and I will show you. hehehe After searching through my stamps we finally found a stamp set that we thought would work perfectly....Touch of Kindness. Here is our version of the Fifth Avenue Floral card. I am really happy with the way it turned out. I had to put a little piece of Calypso Coral in the center of the flower in order for the Pearls to stick. They didn't want to stick by themselves on the sponged ink in the center. Stampin' Up!'s new in-colors are fun to work with. I may need to make a bunch of these to have on hand as they are fairly quick to re-create and have my fav technique on it......embossing. Thanks Val for stamping and having coffee with me the other day. I miss those visits.
Stampin' Up! Supplies used:
Stamp Set: Touch of Kindness (Summer Mini Catalogue)
Paper: Calypso Coral card stock, Crumb Cake card stock, Whisper White card stock
Ink: VersaMark, Calypso Coral Classic Stampin' Pad, Old Olive Stampin' Write Marker
Accessories: Heat Gun, White Embossing Powder, Stampin' Dimensionals, Linen Thread, Old Olive 1/8" Taffeta Ribbon, Scallop Edge Border Punch, Itty Bitty Punch, Sponge, Pearl Basic Jewels
Happy Stamping!
Michelle B!
Independent Stampin' Up! Demonstrator
inspire. create. share.
Check out "The Open Sea & Word Play" stamp camp I am hosting on July 23, 2011 - there are still spots available...register today!
Friday, July 8, 2011
Michelle's Ribbon & Trim Assortment Special
Oh how I love Stampin' Up! ribbon and Trim. The new 2011-2012 Idea Book & Catalogue has some new addtions to their ribbon selection. Not only do they have new ribbon types but new colors as well! I find ribbon assortments a wonderful way to get a wide variety of ribbon at a lower cost. There are only 5 spots per assortment. Be sure to email me right away if you want a ribbon package held for you. There are 4 different ribbon assortments listed below. You are welcome to purchase a spot in more than one ribbon assortment.
Each Ribbon Assortment is $20.00 per package. (No Shipping & Handling, Taxes are included!)
Payment options: Cash or Cheque or Email Money Transfer
3/8” Ruffled Ribbon Assortment
You will receive 2 yards of each:
Calypso Coral (new in-color)
Island Indigo (new in-color)
Lucky Limeade (new in-color)
Pool Party (new in-color)
Wisteria Wonder (new in-color)
Artichoke (new Denim Jean Ribbon)
Blue (new Denim Jean Ribbon)
1/2" Scallop Dots Ribbon Assortment
You will receive 2 yards of each:
Basic Black
Cherry Cobbler
Chocolate Chip
Elegant Eggplant
Marina Mist
Melon Mambo
More Mustard
Old Olive
Pretty in Pink
Tangerine Tango
Same ole' ribbon (Satin, 2 types of Taffeta) just new colors Assortment
5/8" Satin Ribbon, you will receive 3 yards of each:
Bashful Blue
Basic Gray
Chocolate Chip
3/8" Taffeta Ribbon, you will receive 2 yards of each:
Perfect Plum
Pink Pirouette
Riding Hood Red
Whisper White
1/8" Taffeta Ribbon, you will receive 2 yards of each:
Baja Breeze
Regal Rose
Basic Black
1-1/4" Striped Grosgrain Ribbon, you will receive 2 yards of each:
Basic Gray
Cajun Craze
Cherry Cobbler
Melon Mambo
Not Quite Navy
Soft Suede
Wild Wasabi
If you know of someone who likes ribbon as much as I do, please feel free to pass this ribbon assortment onto them. If they take a spot and mention your name you will receive a little "stamping gift" from me.
Happy Stamping!
Michelle Blackburn
Independent Stampin' Up! Demonstrator
inspire. create. share.
Tuesday, July 5, 2011
The Open Sea & Word Play Stamp Camp - July 23, 2011

Come join me for a couple of hours of stamping fun. We will be making 8 different cards (2 each of 4 designs) with the Open Sea stamp set, Nautical Expedition Designer Series Paper and Word Play stamp sets. You will find the Open Sea stamp set and Nautical Designer Series Paper in the Summer Mini Catalogue on pages 8 and 9. Our project wouldn't be complete without a pen, a pad of paper and a case to put everything in. It is like your own custom made stationary set. This would make a great gift!
 Cost: $15.00 for 8 cards, envelopes, pen, sticky pad and case to put everything in.
Time: 1:00 p.m. to 3:30 p.m.
Where: My House (address will be given upon registration)
RSVP by July 8, 2011 - click here to send me an email to register
The inspiration for this stamp camp came from my upline Christy Harsch. Thanks Christy for your inspiration and allowing me to use your fabulous idea.
The inspiration for this stamp camp came from my upline Christy Harsch. Thanks Christy for your inspiration and allowing me to use your fabulous idea.

Happy Stamping!
Michelle B
Independent Stampin' Up! Demonstrator
inspire. create. share.
Monday, July 4, 2011
Grunge Rock meets New In-Colors

I was having fun playing with Stampin' Up!'s new in-colors. Stampin' Up! has added 5 new in-colors to go with the other 5 in-colors that they have. Their new in-colors are Calypso Coral, Island Indigo, Lucky Limeade, Pool Party and Wisteria Wonder. I already have some favs. hehehe The above Grunge Rock card uses the colors Lucky Limeade and Wisteria Wonder. Isn't that a great color comob. The below card has Calypso Coral and Lucky Limeade on it. The Grunge Rock stamp set was one that had always been on my wish list. I think it is a great stamp set to use when making cards for teenagers and young adults with any theme. I have many nieces and nephews and I know it will come in handy when I need to make them a card. I haven't stamped any "occasion" words on the front or on the inside of the cards. I think I will put them aside until I need them.

Stamp set: Grunge Rock
Paper: Wisteria Wonder card stock, Early Espresso Textured card stock, Very Vanilla card stock, Lucky Limeade card stock
Ink: Lucky Limeade Classic Stampin' Pad, Crumb Cake Classic Stampin' Pad, Early Espresso Classic Stampin' Pad, Calypso Coral Classic Stampin' Pad
Accessories: Big Shot Die-Cut Machine, Perfect Polka-Dots Textured Impressions Embossing Folder, Itty Bitty Punch, Silver Brads, Stampin' Dimensionals, Vintage Wallpaper Textured Impressions Embossing Folder.
To order the products to make this project, please contact me directly or go online to my Stampin' Up!
Demonstrator website. There is a direct link on the right hand side of my blog.
Happy Stamping!
Michelle B
inspire. create. share.
Independent Stampin' Up! Demonstrator
Subscribe to:
Comments (Atom)